Little Known Questions About Painting Fabric with Annie Sloan Chalk Paint - Bella Tucker.
from web site

Get This Report on Annie Sloan Chalk Paint and Wax How-to's - Southern
To quote Annie herself "There's no need for tiring priming and sanding you can get straight to the fun bit!" The Annie Sloan chalk paint system actually includes 2 components: the chalk paint, and a protective wax leading coat that's used after the paint dries (you can select to use either a clear wax or a dark wax).


Of course, by the time I navigated to completing the task, I basically forgot everything that the class trainer taught me. No matter! The huge takeaway from this job is that this paint is remarkably forgiving. https://rust-store.com/is-annie-sloan-chalk-paint-right-for-my-project/ discovered through trial-and-error how to finest work with the paint to achieve the look I was going for.
USAGE PAINT + WATER FOR A SMOOTH COAT If you are the impatient type like me, you'll like the lightning quickly drying time of this paint. The quick dry time, nevertheless, postures a little a difficulty when attempting to cover a large, flat area, like the top of a desk.
The Facts About Annie Sloan • Paint & Colour Uncovered
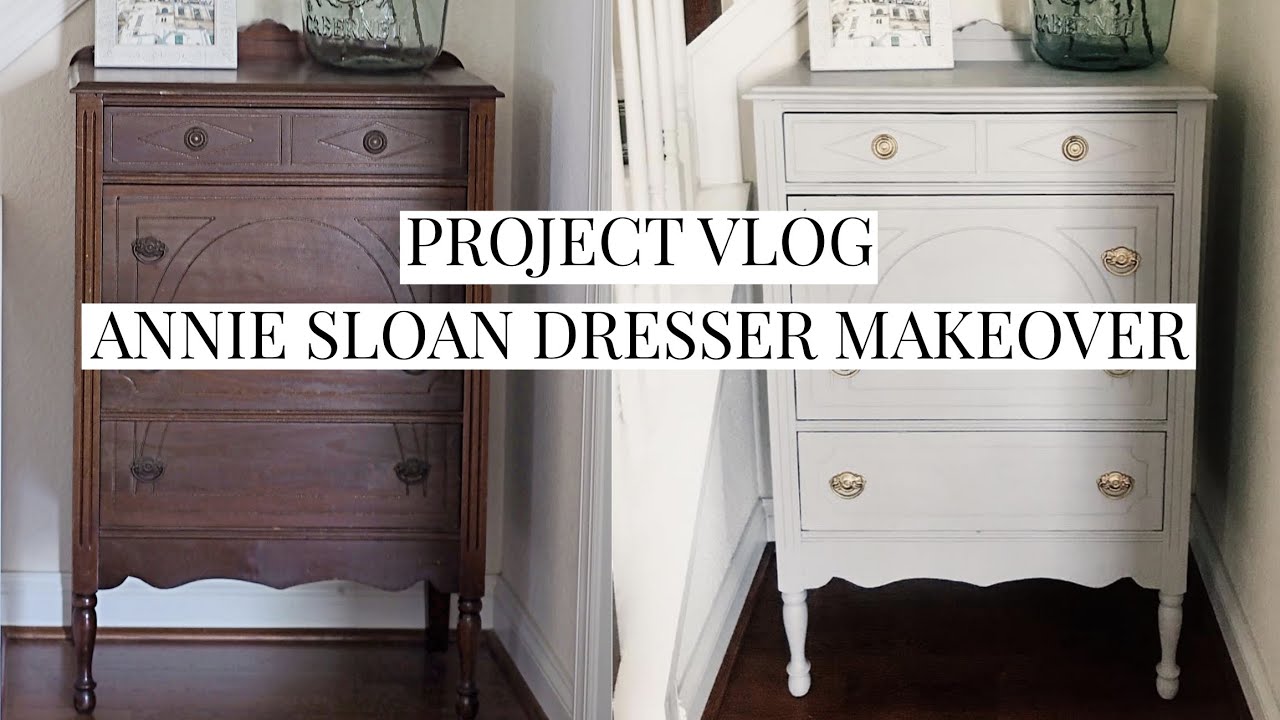
Sufficing with a little bit of water likewise led to a much smoother surface. Don't be alarmed if your very first coat looks like the image below. All will be right with the world when that 2nd coat is applied! See, I told you! As you can see on the drawers, after the second coat of paint was used, I was entrusted to a truly pretty matte surface if you're wondering what this gorgeous color is, it's called Duck Egg.
Little did I understand just how much I 'd fall head-over-heels in LOVE with the pieces, once the wax surface was used. Wowza! It's challenging to capture the surface distinction in an image, but hopefully, you can see the difference between the unwaxed portion of the drawer right and the portion that has actually been waxed left.
Here's another attempt to show you the the contrast between the waxed and unwaxed finish (please excuse the paper plate, which I used to hold the wax): A LITTLE GOES A LONG WAY! I was stunned to see how much paint and wax that remained after I finished the project desk + console.
