From Lifeless towards Fantastic: Revamping the Cabinetry
from web site
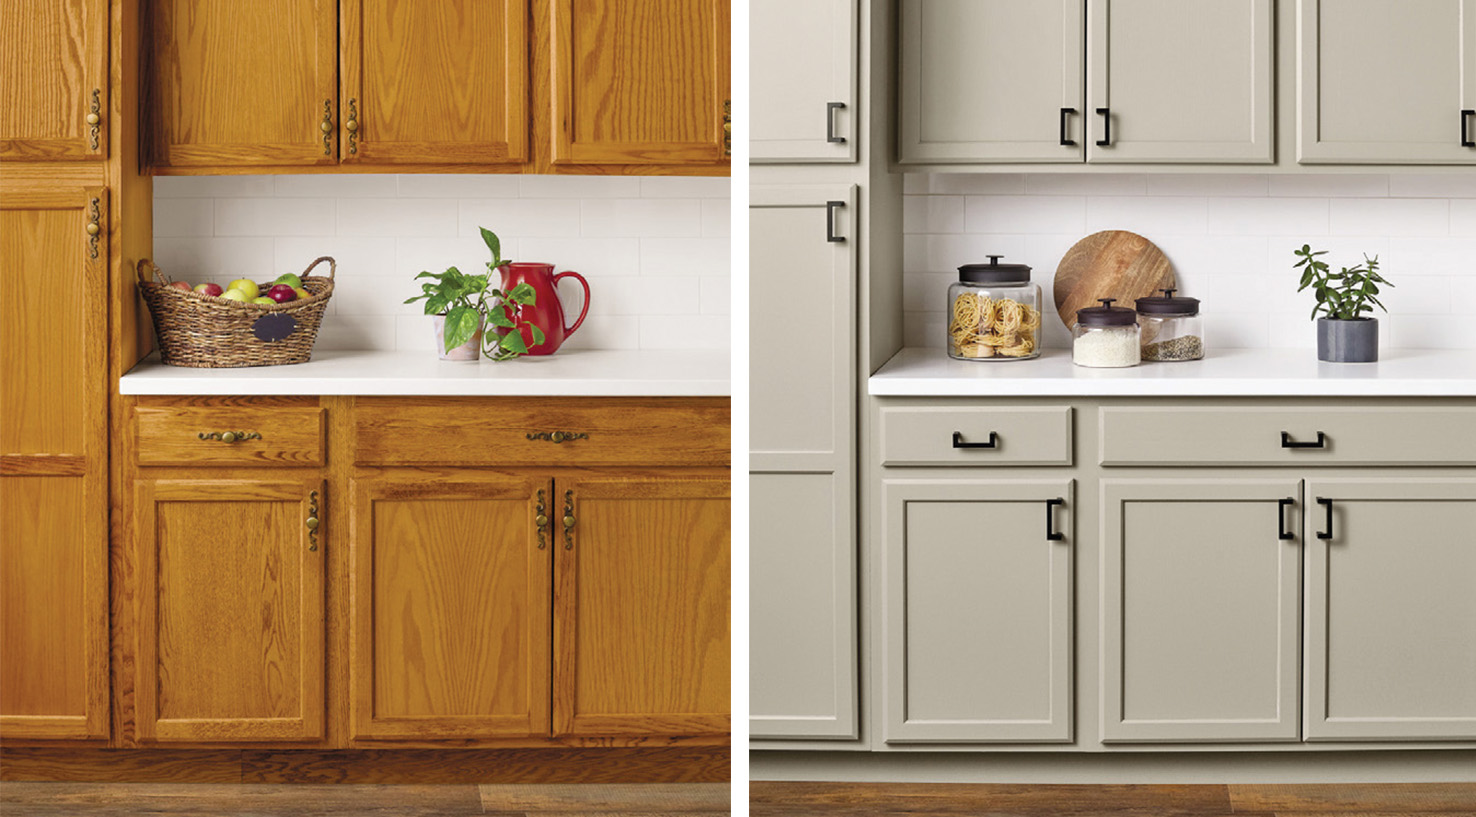
Your cooking space is frequently considered the center of the house, where family meals are shared and memories are made. However, if your kitchen storage are looking worn or old-fashioned, they can darken over the whole environment. In good fortune, kitchen cabinet refinishing offers a simple yet effective solution to breathe new life into your cooking area without the need for a full remodel.
Transforming your cupboards can be a rewarding project that not only enhances the appearance of your kitchen but also boosts its efficiency. If you want to renew your old cupboards with a new color or fix minor damage, refinishing is an outstanding way to achieve a fabulous look on a financial plan. In this piece, we will discuss the phases involved in cabinet refinishing and share tips to secure a stunning transformation that lifts your culinary area's atmosphere.
Selecting the Appropriate Coating
In terms of kitchen cabinet refinishing, picking the appropriate finish is vital to reaching the desired look and durability. There are numerous types of finishes available, every offering unique benefits. For instance, oil-based finishes provide a deep, sleek texture and are highly durable, making them suitable for high-traffic areas. On Diamond Spray Finishers , they may take additional time to dry and produce intense odors during application. Alternatively, water-based finishes are quicker drying, have lower VOC emissions, and clean up, making them a common choice for numerous homeowners.
An additional important element to consider is the sheen level of the finish. Options usually range from matte to high gloss, and every offers a different aesthetic. A matte finish can establish a modern, refined appearance, while a glossy finish provides a bright, polished look that can enhance up the kitchen. Keep in mind that higher gloss levels are usually easier to clean but may accentuate imperfections more than lower sheen levels. Choosing the appropriate sheen can improve the overall decor of the kitchen and cooperate with the natural light in the space.
In conclusion, it is important to consider how well the finish will tolerate wear and tear in a kitchen environment. Look for finishes explicitly designed for cabinets that withstand scratches, stains, and moisture damage. Some brands even offer customized formulas that improve durability and protect against kitchen challenges. By taking the time to review your options, you can select a finish that not only meets your visual preferences but also provides long-lasting protection for your refinished cabinets.
Sequential Refinishing Process
The first step in refinishing your kitchen cabinets is to detached all hardware and take out the cabinet doors and drawers. This simplifies to clean and work on each surface. Make sure to label each door and drawer to confirm easy reinstallation later. Once all items is removed, clean the cabinets meticulously to get rid of grease and dirt. A mixture of warm water and mild detergent works well, but for stubborn grime, consider using a degreaser.
Next, it's time to sand the surfaces. Use a fine-grit sandpaper to gently sand the cabinet frames, doors, and drawers. This will help eliminate the old finish and create a rough surface for the new paint or stain to adhere to. After sanding, meticulously vacuum the dust and wipe the surfaces with a damp cloth. If you're intending on painting, you might want to apply a primer that works well with your preferred paint, offering a solid base for your color.
Finally, you can move on to applying your chosen finish. Whether you’re painting or staining, adhere to the manufacturer's instructions for the best application method. Use a high-quality brush or roller for painting, or a lint-free cloth for staining. Give adequate drying time between coats and finish with a protective topcoat if desired. Once everything is dry, reinstall the doors and hardware, and your kitchen cabinets will seem transformed, giving your space a fresh and updated appearance.
spintax
Suggestions for a Refined Look
To reach a professional finish while restoring your kitchen cabinets, adequate preparation is crucial. Begin by removing all cabinet doors and hardware, making sure that you clean every surface thoroughly. This not only aids paint or stain bond better, but it also avoids any dust or grease from interfering with your finish. Smoothing the surfaces lightly will create a stronger bond for your chosen finish, and using a top-notch primer can also enhance the overall look, especially if you are transitioning from a dark to a bright color.
When it comes to painting, spend in good brushes or a paint sprayer for a slicker application. If you choose for a brush, use long, even strokes to prevent visible brush marks. Always apply a series of thin coats rather than one thick layer, giving adequate drying time between applications. This will result in a more even and long-lasting finish. For a truly professional appearance, focus on the edges and corners, where paint tends to pool; these areas should be carefully smoothed out.
Finally, consider including final touches that improve the overall look of your cabinets. New hardware can significantly impact the aesthetic, so pick knobs and handles that enhance your newly refinished cabinets. Additionally, for a more personalized touch, consider applying a clear topcoat to safeguard your work and add a soft sheen. With careful consideration and the right techniques, your cabinets can achieve that polished look you seek.
